


|
#1
 08-31-2009, 09:26 AM
|
|||||||||||||||||||||
|
|||||||||||||||||||||
|
[GUIDE] EVGA X58 Snow Leopard Mac OS X 10.6.6 (10J567) Installation
OSX LION 10.7.2 INSTALLATION
From 10.6.0 to 10.6.6 Quote:
Prerequisites: Quote:
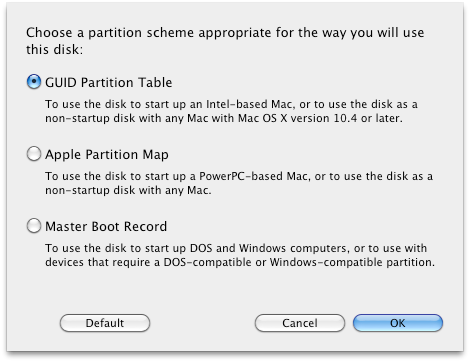
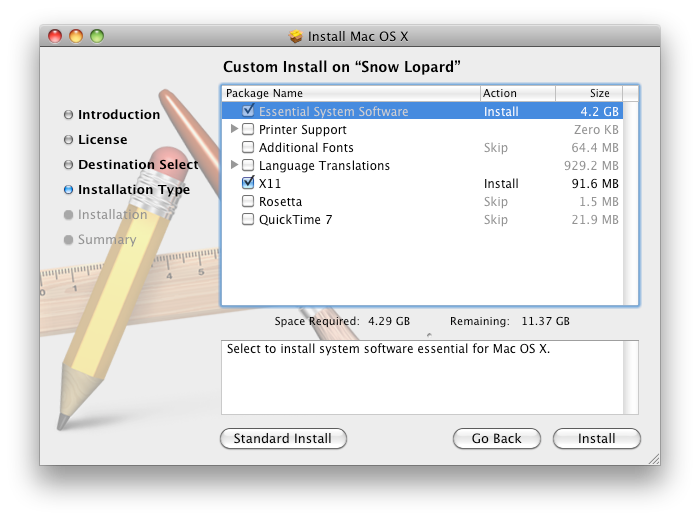
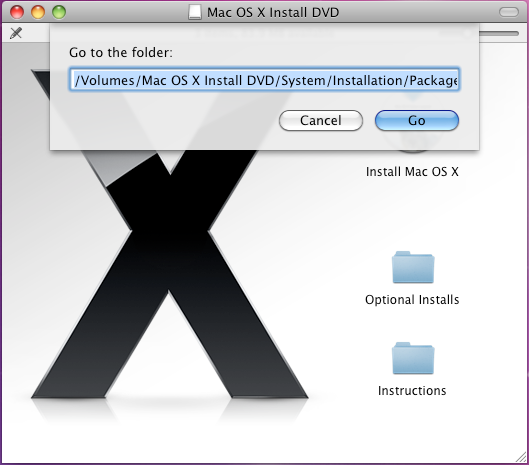
Step 1: Quote:
Quote:
Quote:
Quote:
Quote:
Quote:
Quote:
Quote:
Quote:
Quote:
Quote:
------------------------------------------------------------------------------- IMPORTANT NOTES: Quote:
Quote:
Quote:
Quote:
Quote:
Code:
Last edited by xxxslayeriiixxx; 11-10-2011 at 08:32 AM. 
|


|
#2
09-01-2009, 05:18 AM
|
|||||
|
|||||
|
Important notes continued:
Quote:
Quote:
Quote:
Quote:
I have SLEEP fully working with my motherboard, see my signature. If you had success doing the "How to - Native power management, speedstep, Turbo function " with the DSDT that was provided you do not need to follow this, You just need to do the BIOS changes according to this note. [scroll down for the BIOS changes] Quote:
Code:
Last edited by xxxslayeriiixxx; 01-14-2011 at 10:55 AM.
|

|
#3
09-16-2009, 04:25 AM
|
|||
|
|||
|
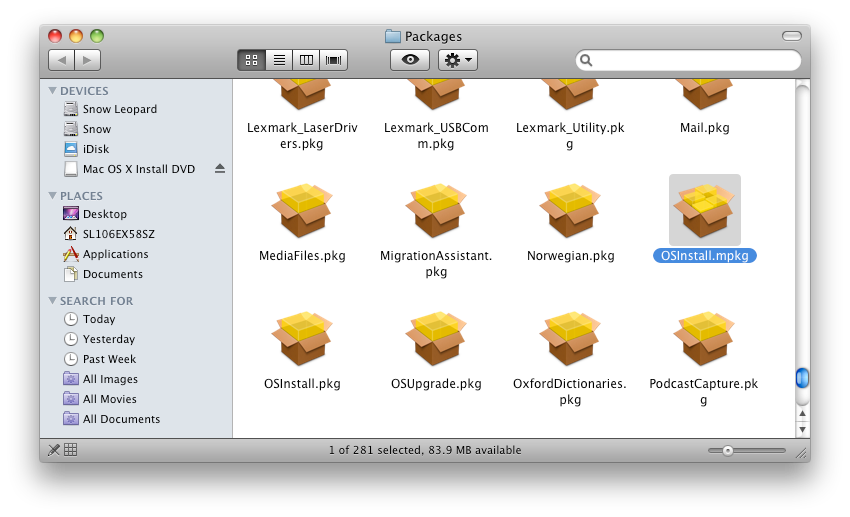
I have SL installed on my macbook and I have a desktop PC I am trying to get it on. What I don't understand is you say that you have to mount the drive you want to put SL on and then click the OSInstallation.pkg, but when I open that package it won't let me install SL on any drive except for the one that is currently running OSX. What am I missing?
|
|
#5
09-20-2009, 03:40 PM
|
|||
|
|||
|
hm
i have leopard 10.5.5 install in vmware i was wondering if i could use that to install snow leopard
|
|
#8
10-11-2009, 07:34 AM
|
|||
|
|||
|
I followed your guide and successfully installed snow leopard, but i've got one lingering problem..
I can't seem to get the onboard optical out in the back to work under OSX. VoodooHDA creates the audio devices, but I can't get any optical use out of em. I have a feeling that the audio devices voodoo creates is from my creative x-fi sound card (I know it won't work under mac, so it's strange that voodoo might be picking it up) since when I go under system profiler there is no built-in audio shown as installed. I haven't tried the other ports, no speakers/headphones besides my receiver.. lol Anyone have any clues how I can get it working?  Board is EVGA x58, latest bios, e758-a1 model.
|
|
#10
10-14-2009, 01:49 AM
|
|||
|
|||
|
hdef audio without voodooHDA
if your interested here is the method I use to get appleHDA to work and no injectors and voodooHDA
to start off you need to convert your dsdt.aml to dsdt.dsl use iASLMe to do this. edit the dsdt.dsl file to edit the part of the code to look like this (I included code before and after the code you need to insert so you know where it goes. just compare it to yours and you will find it.) Device (PX43) { Name (_ADR, 0x001F0003) OperationRegion (PBAS, PCI_Config, 0x20, 0x02) Field (PBAS, ByteAcc, NoLock, Preserve) { BAS0, 16 } Method (SMBB, 0, NotSerialized) { And (BAS0, 0xFFFE, Local0) Return (Local0) } } Device (HDEF) { Name (_ADR, 0x001B0000) Method (_PRW, 0, NotSerialized) { Return (Package (0x02) { 0x0D, 0x05 }) } Method (_DSM, 4, NotSerialized) { Store (Package (0x0A) { "built-in", Buffer (One) { 0x01 }, "codec-id", Buffer (0x04) { 0x89, 0x08, 0xEC, 0x10 }, "layout-id", /**** Is ResourceTemplate, but EndTag not at buffer end ****/ Buffer (0x04) { 0x79, 0x03, 0x00, 0x00 }, "device-type", Buffer (0x10) { "Realtek ALC889A" }, "PinConfigurations", Buffer (0x28) { /* 0000 */ 0x10, 0x90, 0xA1, 0x01, 0x20, 0x90, 0xA1, 0x02, /* 0008 */ 0x80, 0x30, 0x81, 0x01, 0x90, 0x40, 0x21, 0x02, /* 0010 */ 0x30, 0x40, 0x11, 0x01, 0x40, 0x40, 0x01, 0x01, /* 0018 */ 0x50, 0x60, 0x01, 0x01, 0x60, 0x20, 0x01, 0x01, /* 0020 */ 0x70, 0x61, 0x4B, 0x01, 0xA0, 0x01, 0xCB, 0x01 } }, Local0) DTGP (Arg0, Arg1, Arg2, Arg3, RefOf (Local0)) Return (Local0) } } Name (BUFA, ResourceTemplate () { IRQ (Level, ActiveLow, Shared, ) {5,9,10,11,12,14,15} }) Name (BUFB, ResourceTemplate () { IRQ (Level, ActiveLow, Shared, ) {} }) Save the dsdt.dsl file and convert it back to dsdt.aml and save it in your root dir. next remove any injectors or voodoohda files you have. ( or what ever else your running for audio) Back up your AppleHDA.kext in /S/L/E to a safe place. download the modified appleHDA.kext and install it in /S/L/E using Kext utility 2.3.2 (if you have this app simply drag the modded kexts ontop of the Kext utiltiy icon to install) Cross your fingers and reboot should look like this when your done. (see screen-capture) Please keep in mind this is for 32 bit only it wont work if your running the 64 bit kernel. 💡 Deploy cloud instances seamlessly on DigitalOcean. Free credits ($100) for InfMac readers.
|
 Linear Mode
